The Advantages of Selective Sharpening
Sometimes we only wish to sharpen part of the image. This, of course, can be done by first selecting and feathering the appropriate area then applying a sharpening filter. However for more subtle effects and to keep our options open a more sophisticated method is recommended.
The Method
This is simple to do and uses a 'Layer Mask'. The first step is to duplicate
the image. Do this quickly within the Layers palette by dragging the image
layer (possibly 'Background') to the 'new layer' icon at the base of the
layers palette. Alternatively, use the top menu bar and choose the Select
> All, Edit > Copy, Edit > Paste route.
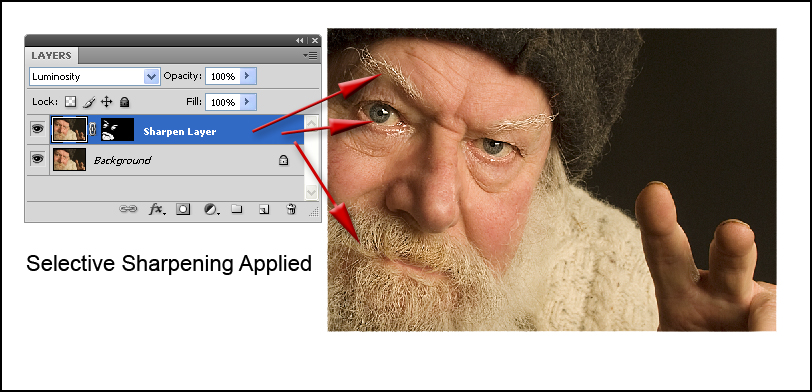
Sharpen the image on the new layer to the appropriate amount. A popular method is by using 'Unsharp Mask' available via Filters > Sharpen > Unsharp Mask.
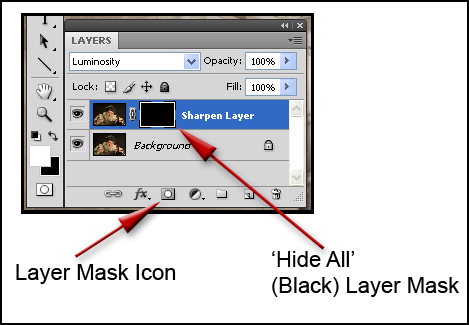
The next step is to 'hide' the effect you have just created. So keeping the same layer active, go to Layer > Add Layer Mask > Hide All. The layer mask 'thumbnail' on the layer appears as a black filled rectangle.
Alternatively, click on the Layer Mask icon (white circle in a grey rectangle) at the base of the layers palette. However, you'll need to hold down the 'Alt Key' as you click to produce a 'Hide All' mask (not using the 'Alt Key' gives the 'Reveal All' mask). The Layer Mask 'thumbnail' will appear filled with black.
With the foreground colour set at white and a suitable brush chosen, the layer mask can be stripped away to reveal the sharpening applied. To reverse the operation, choose black as the foreground colour and as you paint the area will be filled in again.
Depending on the brush tool selected, different pressures or opacities may be applied to make the effect more subtle. You may return to the layer mask at any time for more adjustments.
To reduce the sharpening effect on the layer containing the sharpened image - go to the Opacity for the layer - click the Opacity box in the layer palette and alter the position of the slider control until the degree of sharpening visible is as required.
Note: for all Layer Mask operations you must 'activate' the layer mask, do this by clicking inside the layer mask 'thumbnail' rectangle in the active layer. To return to 'normal' layer mode, click in the image 'thumbnail' in the active layer. (For earlier versions of Photoshop, please refer to Note A below)
When you are satisfied with your image and the adjustments you have made, to reduce file size, the sharpened layer may be merged with the original image.
Selective sharpening is a highly effective method of not showing 'sharpening artefacts' such as halos and the sharpening of unnecessary and inappropriate areas.
Note A: Referring to earlier versions of Photoshop: For all Layer Mask operations, the layer mask icon (white circle in grey rectangle), next to the eye symbol in the active layer window, must be showing. To activate the layer mask, click in the layer mask 'thumbnail' rectangle in the active layer. To return to 'normal' layer mode, click in the image 'thumbnail' in the active layer and the layer mask icon will be replaced by a brush icon. The appearance of the two distinct icons are illustrated below.
Layer
Mask icon next to Eye icon ![]()
Brush
icon next to Eye icon ![]()
To continue
.....
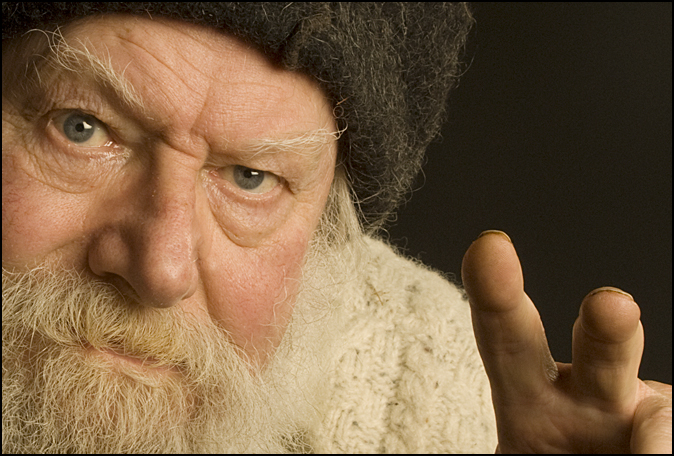
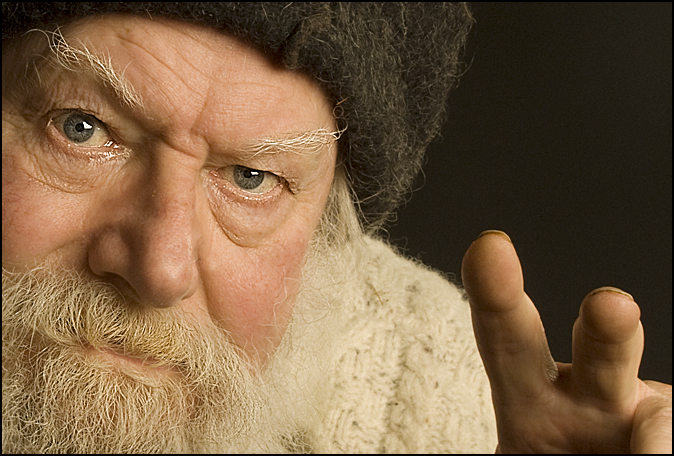
The two example images below illustrate before and after selective sharpening.
Notice how in the 'after' example, sharpening to the eyes, eyebrows and
parts of the beard lend emphasis and character.