Sharpening
An Introduction
Clive R. Haynes FRPS
Most of us sharpen an image at some stage in the digital imaging
process; however with the ever-increasing pixel count for digital cameras
the need to sharpen every image has certainly diminished. Whether I'm
advising one of my students or presenting a workshop, I am frequently
asked what sharpening methods I prefer and how much sharpening I apply.
The answer, of course, is rather like the length of the proverbial piece
of string, so I'll begin by looking at a few basics.
If one is serious about photography and achieving quality results then it's important to retain as much control over the image workflow as possible. Beginning with the camera, I suggest that unless there is a definite need to use in-camera sharpening, it is preferable to switch this option off. This is especially relevant if you shoot in JPEG.
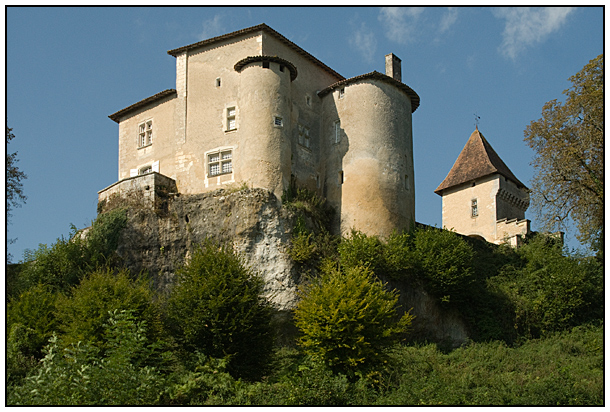
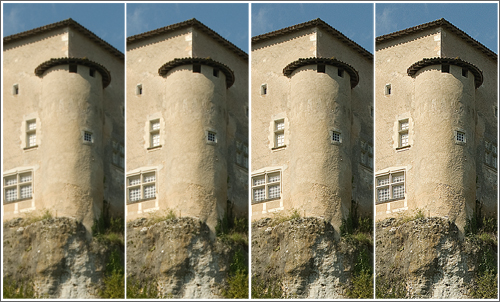
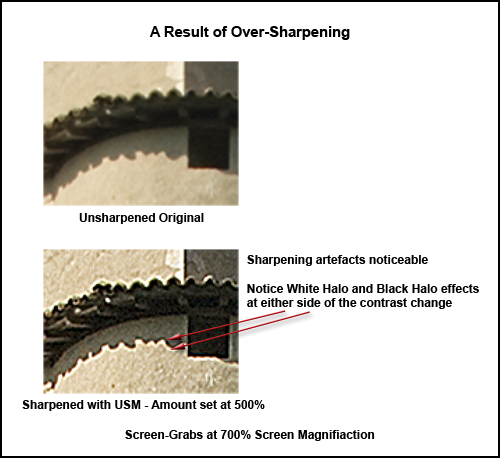
Any sharpening undertaken in a program such as Photoshop will increase local contrast at the pixel-to-pixel level. This local contrast will, to a greater or lesser extent, introduce a halo effect. The halo effect is frequently visible, appearing as an outline around an area of the image where the contrast change is at its most apparent, as in for example, the edge of a building set against the sky. The halo can be white or black depending upon the content of the pixels. In other words, to make a dark edge set against a lighter tone background appear sharper, a minute white line edge is generated to the one side of the dark edge. Conversely, to make a white edge appear sharper against darker-shaded background, a black line is generated to the one side of the light edge. It's generally regarded as bad practice to be able to see these 'halos' and artefacts of sharpening at normal viewing distance. Frequently photographers are tempted to over-sharpen and course, unreal, over-corrected images are the result. We see many examples of over-sharpened images, so be very careful.
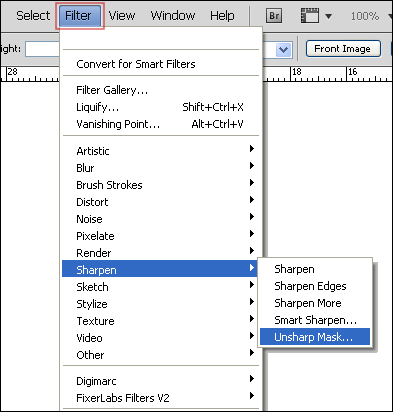
Above: Location of Unsharp Mask Filter (USM)
What do I do? Well,
my own workflow goes something like this:
Upon opening the image in Photoshop, I subtly improve and refine image
delineation by using Focus Fixer V2; this is a very sophisticated program
that meticulously improves the image - (Click on the link at the base
of this page for more information). One can look upon this stage as subtle
'pre-sharpening' to improve the image before onward processing.
During the image workflow, I make all the normal tweaks and adjustments to improve the image and to realise my previsualisation of the outcome. At the final stage before printing, I apply sharpening if required. The sharpening may be applied selectively - that is to say, only to the parts of the image where it really matters. I also decide which method of sharpening will suit the image best, Unsharp Mask, Smart Sharpen, Hi-Pass Sharpen or whatever. I may, instead, decide to use a proprietary sharpening program such as Focal Blade, Nik Sharpener or PhotoKit Sharpener, all of which offer many levels of control. The problem with the more simplistic sharpening methods is that they tend to be non-discriminating of image content and the entire image is sharpened to the same amount. However, even the almost universally popular Unsharp Mask sharpening filter can be applied very successfully if used with knowledge and applied with care.
To continue, click on the Unsharp Mask link below.