|
Gradient Masks
Clive
R. Haynes FRPS
|
| |
|
When
we need to gently merge two or more images, a most useful and elegant
method is the 'Gradient Mask'.
The
fusion of the merge, its intensity, direction and attribute (linear, radial
etc) are all decided by which gradient one chooses and the opacity of
the gradient itself.
|
|
How to make the
mask
Have available two
images
|
|
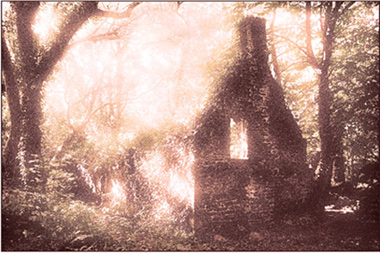
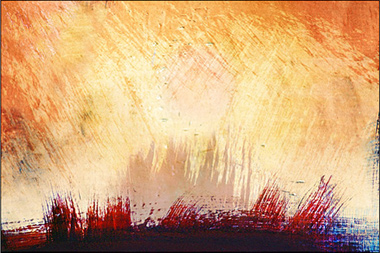
Image
A
|
Image
B
|
|
|
|
| |
| Place the
image to receive the gradient mask on the layer above the Background
(or lower) image ('B' over 'A' in example above) |
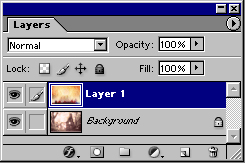 |
Create
a Layer Mask on the upper layer - click on Layer Mask icon at base of Layers
palette
(see 'Layer Mask' link below - for more info if required) |
| |
| (If you're
uncertain about the layer mask icon, look next to the 'eye' icon on this
layer and you should see a small, white circle inside a grey square. Should
you see a 'brush' icon instead, click inside the layer mask thumbnail for
this layer - this will activate the layer mask icon. When you return to
work on the 'picture' and not the mask, the 'brush' icon must be visible
- so click inside the image thumbnail for this layer) |
| |
 The
Layer Mask icon The
Layer Mask icon |
| |
| Working
with the Layer Mask just created and ensuring that the mask icon
(not the brush icon), is present for this layer, select the Gradient
Tool from the Toolbar (see below) |
 Left:
the Gradient Tool on the Tool Bar Left:
the Gradient Tool on the Tool Bar |
|
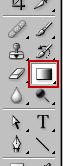
Set
the f/g colour to black, the b/g colour to white
|
| |
For this
example, a 'Linear Gradient' was chosen however other gradient 'patterns'
are quite applicable.
 |
| |
|
Choose Foreground
to Background for the gradient option. (You could click on the pre-set
'Black - White' Gradient option if you prefer)
Set the opacity of
the gradient
|
| |
|
Applying the mask
Drag the cursor across
the image - and behold a smooth transition from the upper image to reveal
the lower
You may require several
attempts to place the grad where you require it, to estimate it's transition
and to set its opacity.
|
| The extent
of the Gradient on the Layer Mask will be seen in the Layer Mask thumbnail
|
| |
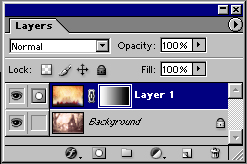 Left: the Gradient
applied to the Layer Mask and visible as a shaded area
Left: the Gradient
applied to the Layer Mask and visible as a shaded area |
| |
|
|
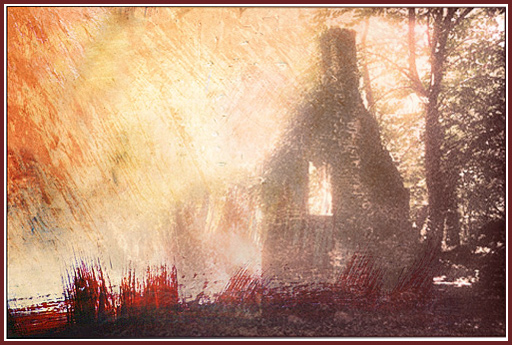
| The image
above illustrates the application of a Gradient Mask to make a smooth, linear
transition from one image to another |
| |
|
A
Gradient (with 'Quick Mask') can also be very helpful in applying a filter
effect gradually to an image -
see link below
|
| |
|
|
For
information about the use of Gradient Masks when applying a 'Drop Shadow'
- click the link below.
|
|