Combining Images on the Same Page
Making two or more pictures fit the same page
Clive R.Haynes FRPS
"I've
made two images of about A5 size and I would like to print them on the same piece
of A4 paper" - this is a question I'm frequently asked whilst running Photoshop
courses.
It's not always simply for reasons of economy as there is often the
need for two or more images on one piece of paper - for design and layout purposes
for instance.
We'll begin with making two landscape format A5 pictures to be printed, one above the other, onto an A4 size sheet of paper.
Having made or opened the first image we need to ensure it's the correct size.
Image Size: Choose a width that is no greater than the narrower side of an A4 sheet. This means that as A4 is 20 x 28cm (portrait orientation) the width of the landscape picture cannot exceed 20cm, allow some space and make it 19.5cm. To do this, go to Image > Image Size (make certain the resampling is 'off').
At this stage, it's a good idea to note down the File Size (Mb) and resolution (ppi) of this first image (you'll need it later if you're scanning-in the second image as a new file).
 The position of the 'Anchor Position' for the image
Click 'OK' and the first picture will be at the top the sheet.
To view the effect press Ctrl and 0 (zero) together. To view it in 'full screen' mode, press the tab key, then Ctrl and 0 (zero) keys together and then (separately) 'F' - this will fill the screen with the image - and show the amount of canvas available. (Note: pressing the tab key will have taken all the palettes off, pressing it again will restore them). To restore the 'window', press 'F' twice more.
When you expand the canvas size the extra space added will assume the shade of the background colour (usually white, unless you have some other colour selected).
If the image has no Background Layer then a chequerboard pattern will appear the 'empty space will therefore receive no colour and appear on the print as paper base white.
If you wish to make a Background, go to Layers > New > Layer from Background.
At this stage, your image area should look something like this:
The
second image
Now this part can be slightly tricky. Not so much in the
simple mechanics of opening and copying/transferring the image but more to do
with the possible complications arising from working with images of different
resolutions. You are, after all, asking two separate image files to occupy one
common space.
If the two images have the same number of pixels per inch then copying across is no problem - all that may be required is a little tweaking with the Transformation tool (via Edit > Transform). If, however, the images have different resolutions then things get more exciting! Anyway, in essence, this is what you'll be doing.
If you are scanning-in a new second image, then create this new image at the same resolution (pixels per inch) as the first - to check, go to the first image and check Image > Image Size and look at the resolution figure, scan in at this figure. As an alternative, the Pixel Dimensions figure, expressed in Mb, noted earlier, may be used. Adjust the scanner parameters, to make the ppi or the file size as required, then scan-in the new image.
If the second image is intended to be the same physical size (cm x cm) as the first, then the file size of the second image (in Mb) should, ideally, be identical to the first, therefore making a note of the first picture's 'Image Size' in Mb when initially opening is a very good idea (as the first picture is now sitting in a larger canvas area with a consequently greater image size).
This isn't so complicated as it reads, it's just that there are so many variables. So here we go
Taking the second image across to the first
With the second image now ready there are two methods of taking it into the first image area.
a) The second picture has been just scanned-in and is more or less the correct size. Select > All > Edit > Copy.
Go to the first image, Edit > Paste. Use the Move (Nudge) tool to accurateky position. Using the keyboard 'arrow keys' (to the right of the keyboard keys) will permit gradual 'nudging' into position.
Should
you need to re-size:
Go to Edit > Transform > Scale
Whilst holding down the Shift key drag one of the corner square 'handles' to make the size you need. Press the Enter (Return) key to confirm new size. If you don't hold the shift key down then the re-sizing of scale will not be proportional.
If you wish to change your mind and decide not to change the scale after selecting the Transform option (a box appears around the image) - press the Esc (Escape) key to cancel the tool.
b) This time the second image is from your existing files of pictures - so it could be any size..
Open the image and copy/move it to the first image area. Should the image be at a lower resolution than the first then it will appear on the small side for the page. Transforming it as described above may be OK but if the transformation (enlargement) is great, then poor image quality will result. It may be advisable under these circumstances to resample the second image 'upwards' before importing (again, referring to the 'Image Size' / Pixel Dimensions' noted for the first image) - not desirable but possibly the only solution. Note however, that if the image is very small, the results are almost certain to be less than acceptable.
Should the second image be larger, then reducing the scale via the Transform > Scale route will be no problem.
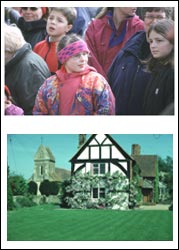
Below: The resulting composite picture of two images on the same page.
Repeat the procedure as above starting with the Image > Image Size : This time Height is the controlling influence - make it 20cm for A4 and this will allow, when expanding canvas size, for a width of 28cm max. The Canvas Size 'Anchor Point' will need to be changed - this time choose the middle left rectangle.
If you wish to import more images, the discipline is much the same. Decide upon the first image and build the others above, below or to the side, taking care with image resolution, transformation and resampling.
Don't forget to select either 'Portrait' or 'Landscape' setting and the correct (A4) paper size in the printer dialogue box.