RAW Files
A Basic Outline and Guide to Understanding and Using 'Camera RAW'
Clive R. Haynes FRPS
The best approach is to be prepared for the problem.
If one is aware that lighting / colour temperature is a problem then take two shots, one with the 'reference white' in place and one without. If a single shot is the only opportunity, place the 'reference white' in a place that's easy to remove later by the 'cloning stamp' tool.
If the opportunity exists to take two shots, then the correction necessary can be applied to the shot without the 'reference white' later.
Of course the scene itself may contain a white that is in the right location and this may be used as a reference. However, remember that the 'reference white' should be located to receive the light that you wish to correct.
Let's look at a scene taken in ordinary tungsten room lighting.
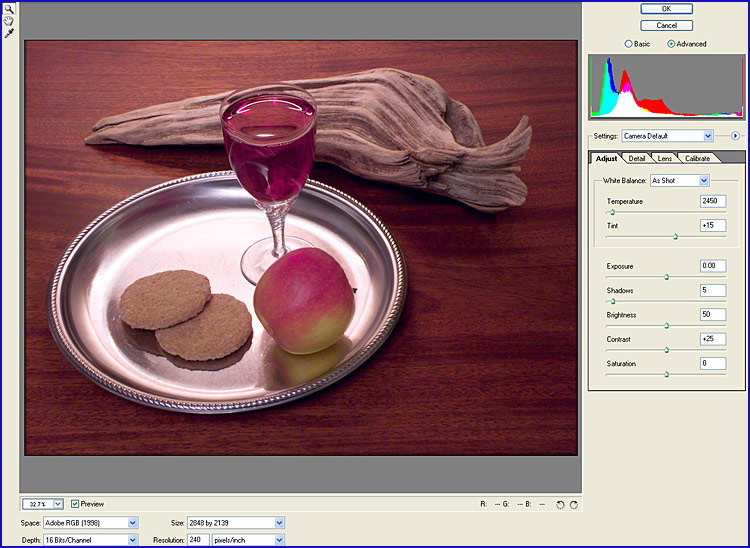
This time, after opening the image, click on the White Balance tool at the top LH side of the RAW viewing box.
Take the Eyedropper into the image area and click on the 'reference white' to set the white point - magically the colour balance improves! Simple and very effective. See below:
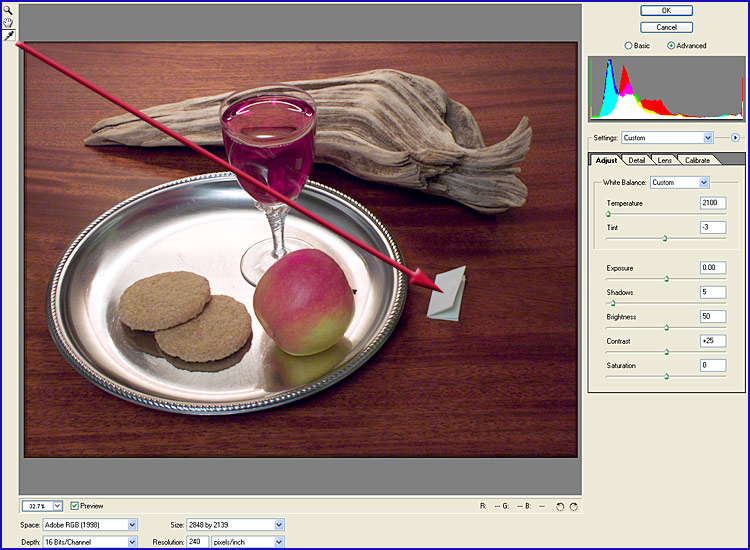
The scene above has now been improved - it's less 'warm' and much more natural.
The 'reference white' piece of paper in the example above is a little large - this is for clarity of illustration, in practice it would be smaller and easily removed by 'cloning'.