RAW Files
A Basic Outline and Guide to Understanding and Using 'Camera RAW'
Clive R. Haynes FRPS
From time to time things go wrong and the exposure is not what we would have wished.
Fortunately Camera RAW can recover an amount of 'lost detail', whether under-exposed or over-exposed.
The example below deals with an amount of over-exposure and the same basic principals may be applied for an underexposed scene.
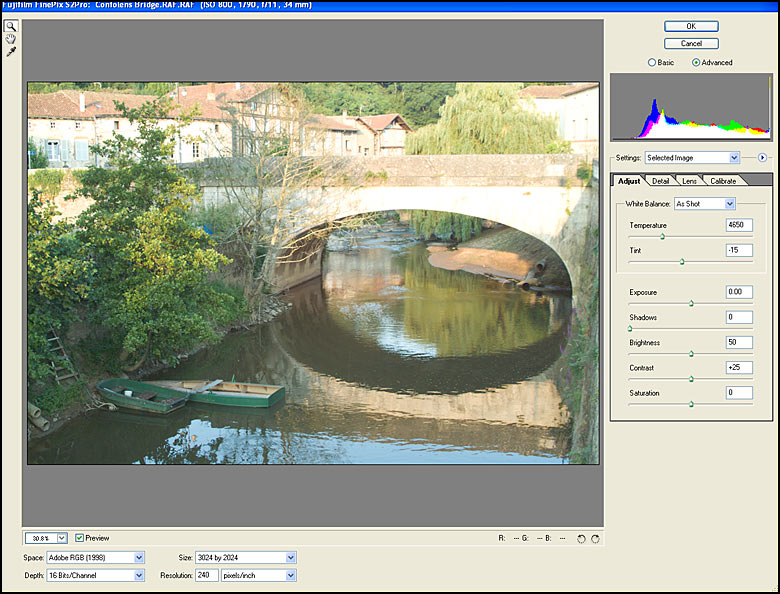
Examining the Histogram for the image above we can readily see that the RH side of the Histogram - the 'white / max exposure end is running off the edge of the scale. If this was a JPEG or TIFF image then nothing could be done to rescue the missing detail. RAW files allows around six 'f-stops' of exposure recovery.
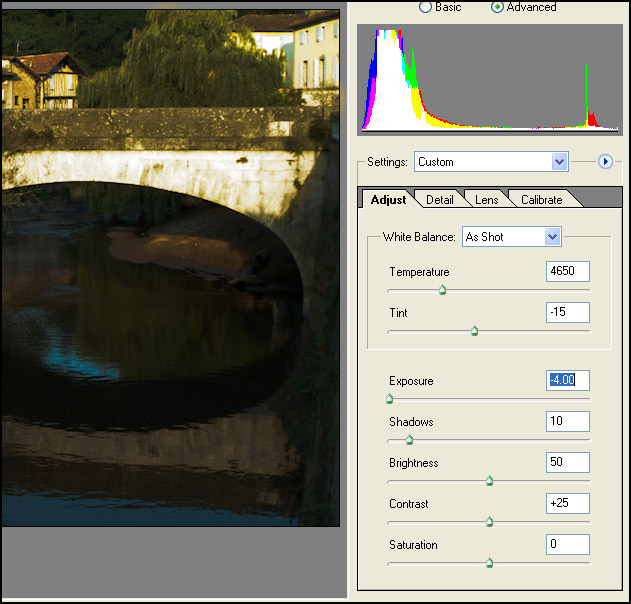
In the case illustrated above, the procedure would be to optimise the general exposure and any other 'corrections' for the scene using the RAW dialogue box and 'save' as a .PSD file, then re-open the original RAW file and make the exposure adjustment shown. Click 'OK' to open the adjusted (darker) image.
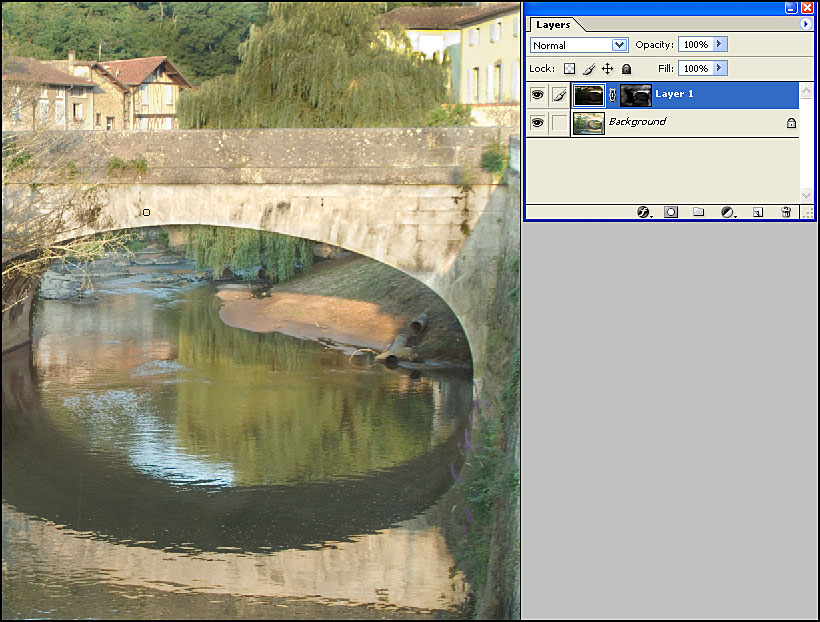
The
two images would then be combined in Photoshop by 'copying' and 'pasting' with
the' improved (darker) image' to a layer above the overexposed original.
Next,
a Layer Mask' would be used to selective combine the best sections from each image.
See picture below.
For more information about using 'Layer Masks' click on
the link at the base of this page.
Note
1:
Generally speaking it's better to slightly over-expose an image when shooting
in RAW. This may at first glance appear to be strange advice, it's because of
the nature of 'image capture' in RAW. In RAW the 'headroom available for highlight
recovery is quite surprising. However as in all things, one should carry out exposure
tests with the camera you are using.
Compensating for possible overexposure
by deliberately under-exposing say by a stop or so - and yes, we've all done this,
can result in the shadows becoming 'blocked up'. The 'blocking' of shadows can
give rise to an excessive amount of 'digital noise' becoming visible when these
areas are 'lifted' out of the gloom.
Note
2:
The preview histogram in your digital camera does note necessarily give
a true indication of the actual range of tones recorded in RAW as the histogram
display is derived from a JPEG version of the image - it may well therefore indicate
'clipping' where in fact RAW retains the detail.
Do experiment to discover how much latitude you camera allows in RAW.
- click the 'Continue' link below.