'Levels'
Clive R. Haynes FRPS
We've
seen what happens when the 'black' and 'white' ends of the 'Output' (printer)
'sliders' are adjusted.
So let's see what happens if we make a dramatic change to the setting.
This will help to improve the understanding about how the adjustments
work.
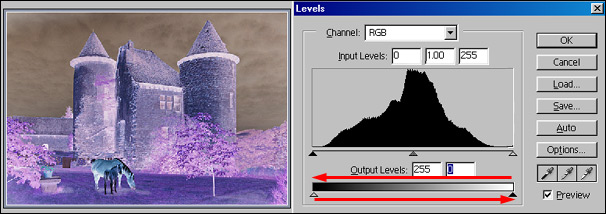
The blacks are printing as white and the whites are printing as black and the intermediate grey tones are 'reversing' along the way. Plus, as were working in 'RGB', the colour content also becomes a 'negative'.

Above: In this example, the mid-point 'slider' has been pushed to the darker end of the gradient scale and the Blue Channel content is become more blue.
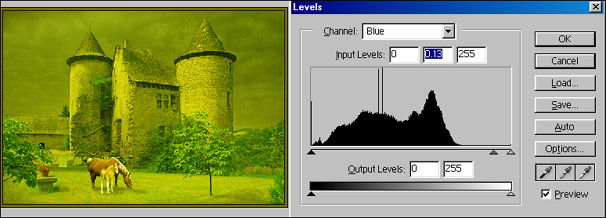
Above: Here's the
answer - the mid point has been moved to the lighter end of the gradient
and blue is removed from the image. The result is a 'negative blue' -
that is to say the opposite colour to blue, or as we say the 'complementary
colour to blue - which is yellow and here it is.
We therefore have the ability to change colour shift by adjusting 'Levels'. This is something we'll explore as it can help with correcting for a 'colour cast'. Go to the next page.....