Hand-Tinting continued....
Clive R. Haynes FRPS
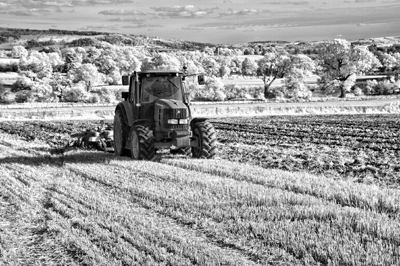
This worked example takes a monochrome image as the starting point.
As the image is entirely shades of black to grey to white, the artistic and colour-based decisions are entirely yours.
NB: Should you be opening an image that's Grayscale' or has been converted to Grayscale', then, immediately after opening it you must go to Image > Mode > RGB. Unless the monochrome image is a colour file (in this case RGB) you will not be able to hand-tint it.
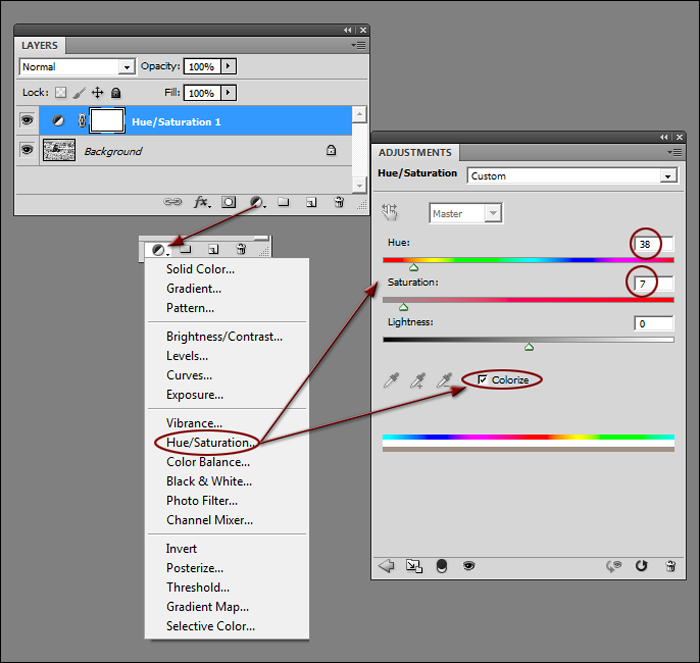
If the image is a portrait, landscape or a more nostalgic scene, or perhaps an old photo that's been copied from a family album, then the application of a gentle sepia tone can be very helpful. The sepia tone will form a warm base colour from which to begin. It's best to apply the sepia by an Adjustment Layer, tick the Colorize' box and set the Hue to around 38 and the saturation to about 7 to 9. As it's an Adjustment Layer', it can easily be edited to alter the hue and saturation. See below.
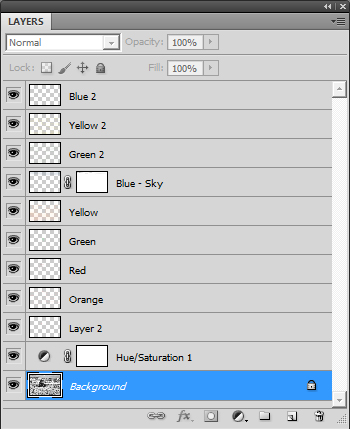
I show the layer structure for the landscape image above as it progressively develops:
Open the image file
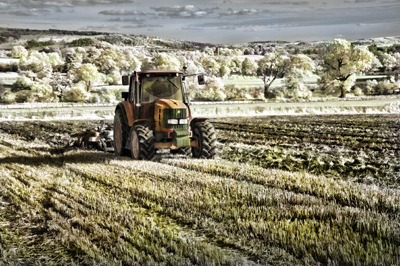
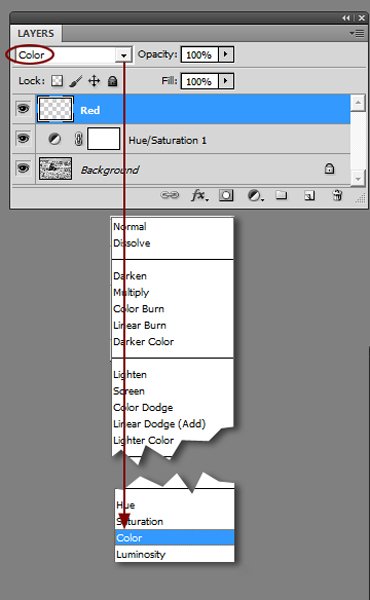
For the first Hand-Tint' Layer I set the Foreground Colour to red and with a Brush set at around 10% Opacity, I began to build up the colour on the tractor body. I don't recall what colour it was originally but so far as I'm concerned all tractors are red and if they're not, well they jolly well ought to be. Anyway, it's my picture -and that's the beauty of hand-tinting.
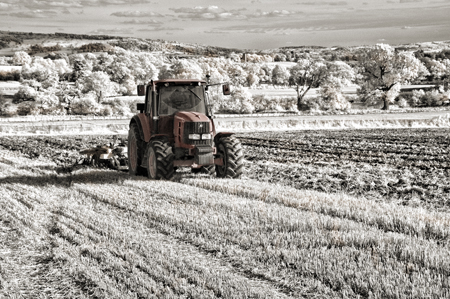
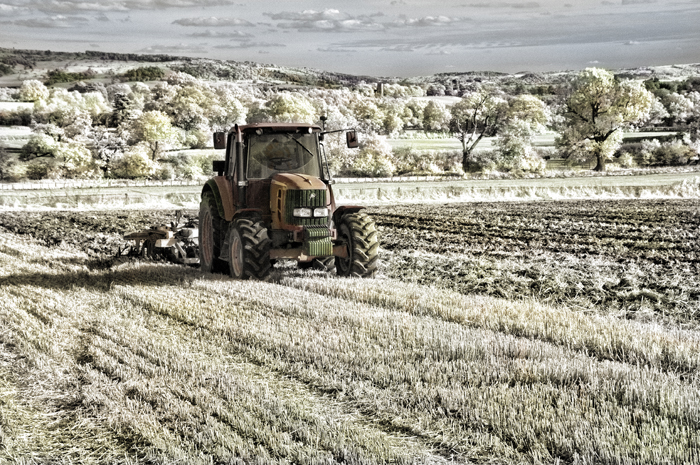
Here's the completed image to this stage and for the method of Hand-Ting' this is as far as you need to go. If you wish to see how I continued tom develop this image, please click the link below.
To continue ..... Click on the link below.....