Hand-Tinting continued....
Boosting the Image
Clive R. Haynes FRPS
I experimented with some further adventures by making merged layers' of all the work as Stamp Visible' layers. I then boosted the detail and colour tone with some really useful Topaz Labs' Plug-in filters (click on 'Topaz Labs' for more info or use the link at the base of this page).
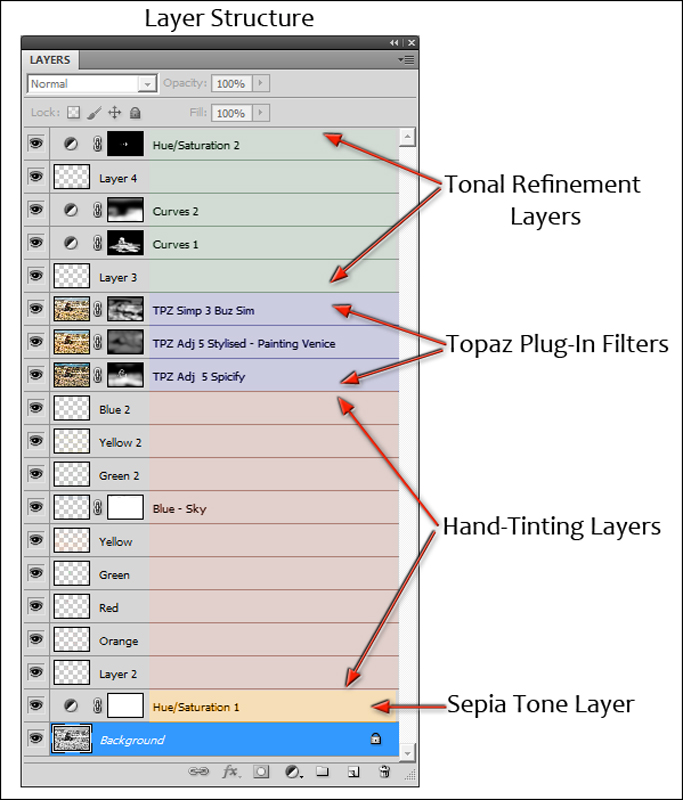
I successively added Topaz filters, gradually building the image and editing with Layer Masks. I finalised the image by selectively adjusting local contrast using Curves' then carefully darkening areas to add modeling and drama. The screen grab' of the final Layer Structure illustrates the build-up from the base. The three successive Topaz Labs Plug-in filters were: Adjust 5, (Vibrant Collection) Spicify', Adjust 5, (Stylised Collection) Painting Venice' and Simplify 3, BuzzSim'.

Below is the Layer Structure for the final version