Hand-Tinting
Clive R. Haynes FRPS

This technique has its origins in the dim, distant past of photography when colour film was unavailable or very expensive. It continues to a following amongst fineart photographers' as there's a high degree of artistic control in the application and mixing of the colour palette and that personal-touch' can be applied.
I'm going to illustrate the method using two examples, one a colour image, the other monochrome. As with many techniques, the options are many and a multitude of refinements can be added. What follows will start you off.
As with many of the more 'artistic' methods, the workflow is made more easy and intuitive by using a graphics tablet and pen'.
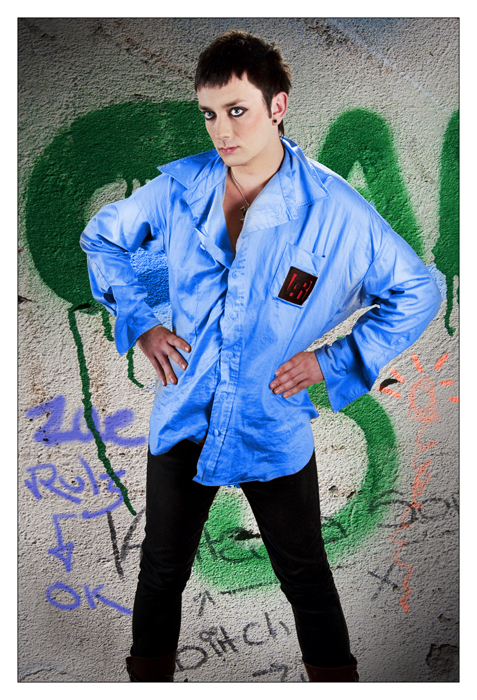
The starting image is this fashion studio-shot.
I had it in mind to change the colour of the shirt, change the model's eye colour to match my choice of blue for the shirt and to add a little more graffiti.
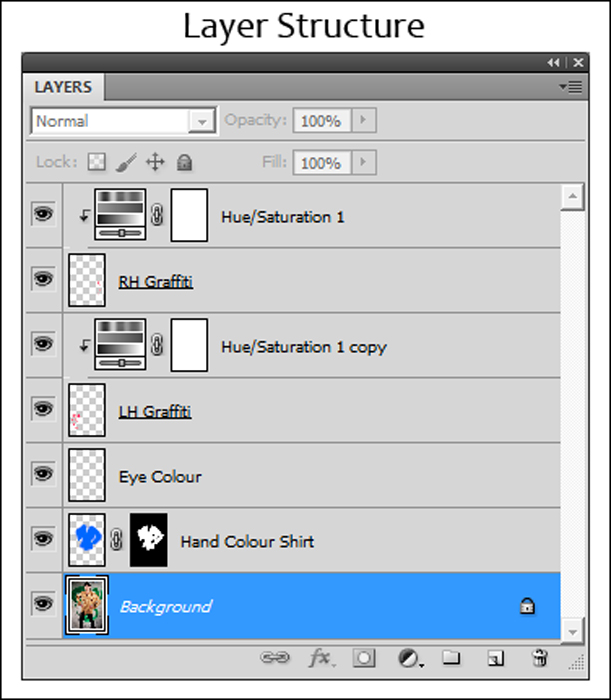
Begin by adding a New Layer above the Background.
Change the Blend Mode of this Layer from Normal' to Colour' (it's near the bottom of the Blend Mode list). To access the Blend mode menu, click on the small drop-down arrow to the right of the word Normal' at the top left of the Layers Palette.
Click on the Foreground Colour and set the colour to your choice.
Choose a suitable brush and work is made easier and more effective if you set the opacity for the brush tool (on the Options Bar for the brush) to a low level, say 10 to 15% and use successive strokes' to build density.
Once you are satisfied with the coverage, add a Layer Mask to selectively erase' errors.
You can reduce the overall opacity of the 'Hand-Ting' Layer if you wish.
To give more control over the nuance of colour, an Adjustment Layer can be added where the Hue and saturation adjusted to suit the image. Click on the Adjustment Layer icon (half black, half white circle) at the base of the Layers Palette and choose Hue & Saturation from the drop-down menu.
Once your happy with the colour, add another New Layer to tint another part of the image. I made two more such Layers, one for the eyes (colouring the irises blue) and the other to add extra graffiti. For the left-hand (blue colour) graffiti, I set the Layer Blend Mode to Darker Colour' to intensify the effect.
NB It's important to use a Blend Mode that allows the texture of the image to be retained and Normal' is not usually suitable as the texture becomes weak or is totally blocked out. However Hand-Tinting is possible for almost any base tone except white or black. If you are faced with dealing with black or white in the image then you'll have to resort to Normal'.
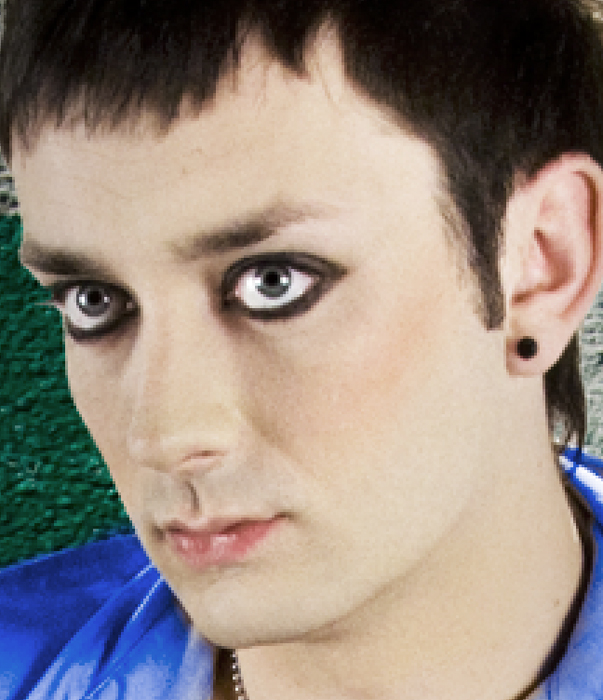

Before Eye-Tint Change