'Digital Watercolour Technique '
continued...
Clive R. Haynes FRPS
Next,
Activate Background Copy 2
Depending upon the effect you need and/or the image size choose one of the two suggested starting points:
Filter > Blur > Gaussian Blur > (start with say,)10 pixels > OK
OR
Filter > Noise > Median > set between 8 and 25 (once again it depends upon image size) > OK
Set the Blend Mode for this Layer to Darken'
Hold down the Alt' key and click on the layer Mask icon at the base of the Layers Palette (small grey square with a white circle at the centre next to the fx' icon). This will produce a Hide All' Layer Mask and the effect you've just produced will disappear. Note that the Layer Mask on this Layer shows as a black rectangle indicating that the masking effect is covering the entire image (that's why you can't see the effect on this layer).
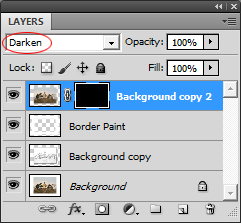
The blurring effect you created can now be artistically restored by using a suitable brush and ensuring that the Foreground Colour is White
As you paint' with the Brush Tool' areas of Darken Mode Blur' will be revealed. Take care at this stage to reveal only the areas that are artistically important to your picture.
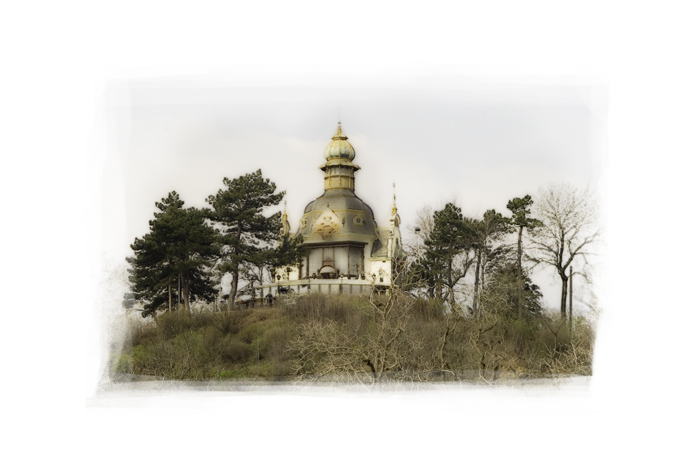
Above: The general appearance to this stage with areas of the image selectively blurred as described above.
The next stage, 'Applying Texture' is described on the continuation page, click on the link below.....