Curves
Clive R. Haynes FRPS
Let's make other, very straightforward, alterations to the shape of the 'Curve' and the logic will become more apparent.
What happens if, instead of altering bending the shape of the curve we
move it along the edges of the gradients?
Let's explore these options.
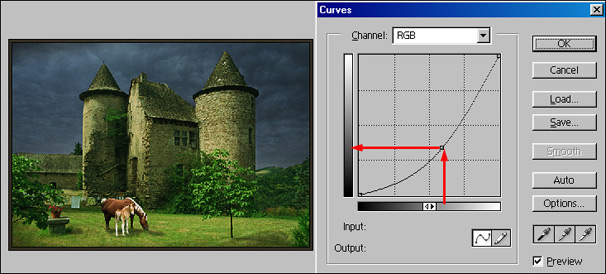
Above:
Let's examine what's happening in the dialogue box above.
The pale red line
indicates the starting point for the curve - we can refer to this as the 'normal
position'. Any distortion or movement from 'normal' will affect the image in some
way. It's a good idea to always bear in mind the slope of the line from corner
to corner when beginning to make changes, as alterations to the shape of the curve
can then be related to the starting point. In other word we can picture just how
far from the straight line we have strayed.
Some people place a pen on the
monitor screen from corner to corner of the 'Curves' dialogue box to see just
how far from the straight line they have come.
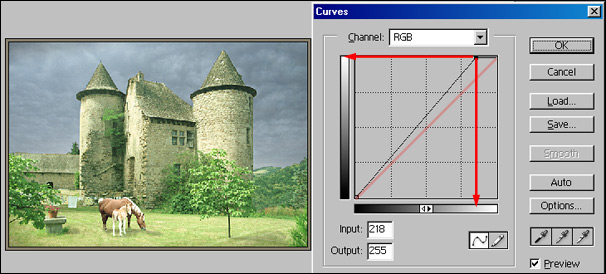
In
the example above we can see that the light grey area on the lower gradient scale,
representing ('Input') 'light', has been pushed over to the left along the top
edge. This instructs the ('Output') 'ink' to print everything to the right of
the chosen grey area as white. Light greys become white.
This 'movement' has
the additional effect of taking the whole straight line of the 'Curve' towards
the left and this also lightens the image. The dark greys remain little affected
and the black point remains anchored at the corner, black = black ink.
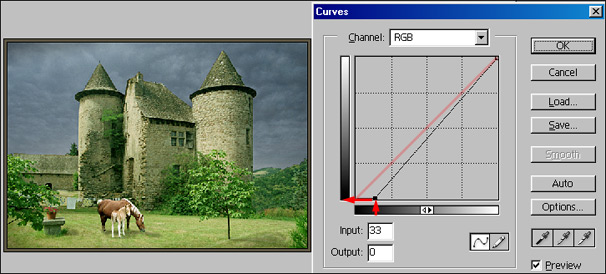
This 'movement' has the additional effect of taking the whole straight line of the 'Curve' towards the right and this also darkens the image. The light greys remain little affected and the white point remains anchored at the corner, white = white.