Frequently,
we take a shot of a landscape,
the lighting is right, the subject is appealing but the whole effect is
let down by the absence of a good, strong sky.
Like many photographers, I shoot sky pictures and keep them on file -
as I know they'll be useful one day in contributing to the strength of
a landscape composition where the sky is poor.
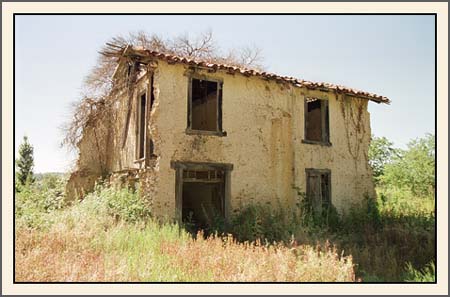
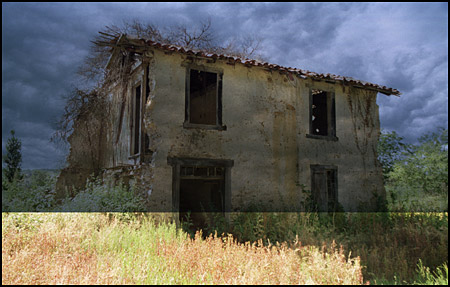
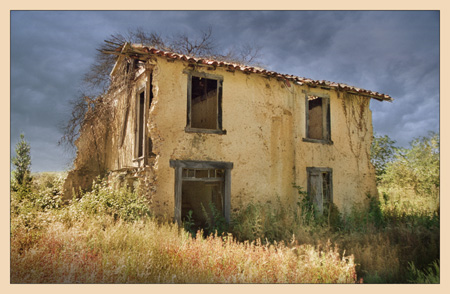
The image below has potential but lacks a dramatic sky to really make the scene come alive.
Putting a new sky in with Photoshop is quite straightforward, however problem areas do occur where small details need to be retained. The image below, with all the twiggery around the roofline is one such example.
What follows is a quick and effective method of adding a new sky to an image where the sky area is blank or bland (that is to say, it doesn't contain clouds that will cause a conflict) and where we wish to preserve intricate detail.
The Method
Open the picture as a Background Layer
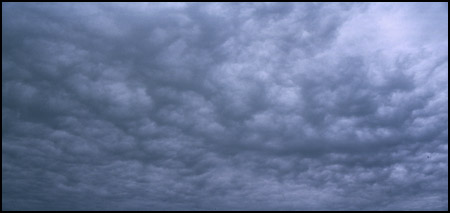
Choose your sky image
and either 'drag and drop' it onto the Background layer by using
the Move Tool.
Or 'copy and paste' it there by this route.
In the Sky image: Edit > Copy.
Next, return to your picture image
Edit > Paste and the sky will appear on the layer above.
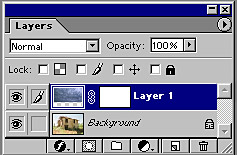
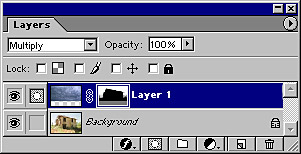
With the Sky layer active, change its Layer Blend Mode to 'Multiply'. To do this, go to the Blending Modes ( the little horizontal box, top left of the palette with 'Normal' showing) and click on the drop-down arrow. From the list that appears, select 'Multiply'.
Upon doing this, the imported Sky will immediately fill the bland sky area and provide a hard cut-out effect along edges of buildings, trees and around branches. All you have to do now is to erase the parts of the sky where it covers inappropriate areas, trees etc.
The
best way to carefully remove unwanted areas of sky the preferred method
is by the use of a 'Layer Mask'.
Activate the Layer Mask by clicking on the small icon with the white
circle inside a grey square at the bottom left of the Layers Palette
The
Layer Mask Icon looks like this.........![]()
Select a brush and set your brush size
Make certain that the Foreground Colour is Black and the Background Colour is white - see below
The Foreground / Background
Colours and icon.........
Should you wish to restore an area swap the foreground colour to white.
NB Make certain you recognise which icon is which. Look at the icon to the right of the 'eye' icon in the layers palette, now, do this:
a) Click in the image (thumbnail)
rectangle of the active layer and the Layer Mask (grey square with a white
central circle) icon changes to a brush icon ![]()
b) Click in the Layer Mask rectangle
and it changes back again to show the Layer Mask icon ![]() .
.
This is important - painting on the Layer Mask needs to be done with the Mask icon visible, whilst work on the image itself must be done when the Brush icon is visible.
If necessary, the opacity of the sky layer may be reduced to suit the scene.
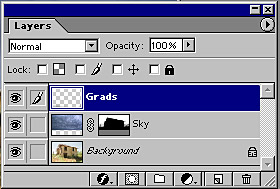
To increase the drama of the scene apply some 'Gradients' to carefully darken areas.
Create a new (empty)
layer at the top of the layers stack by clicking on the New Layer icon
at the base of the Layers Palette
Do this by selecting the 'Gradient' tool from the tool bar
Make certain that a 'Linear gradient' option is chosen
Set black as the Foreground colour
Set the Gradient option to Foreground to Transparent
Set the Gradient Opacity to around 30%
Tick the 'Reverse' box and drag the gradient line towards the area you
wish to make darker
If necessary, the opacity of the gradient layer may be reduced to suit
For more detailed information on this topic see link at base of page.
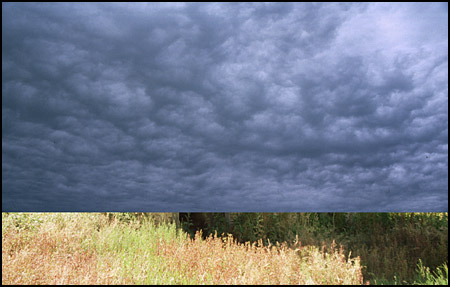
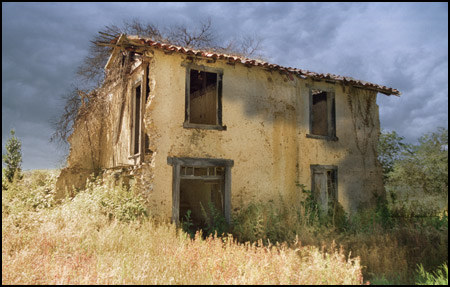
Above: The final image