The Pen
Tool
Introduction to Making 'Paths'
Continued
Clive R. Haynes FRPS
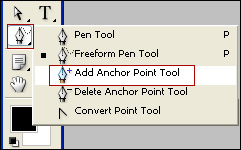
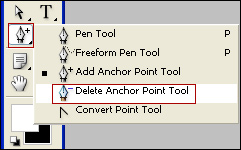
From the drop-down list of 'Pen Tool' options, choose 'Add Anchor Point Tool'.
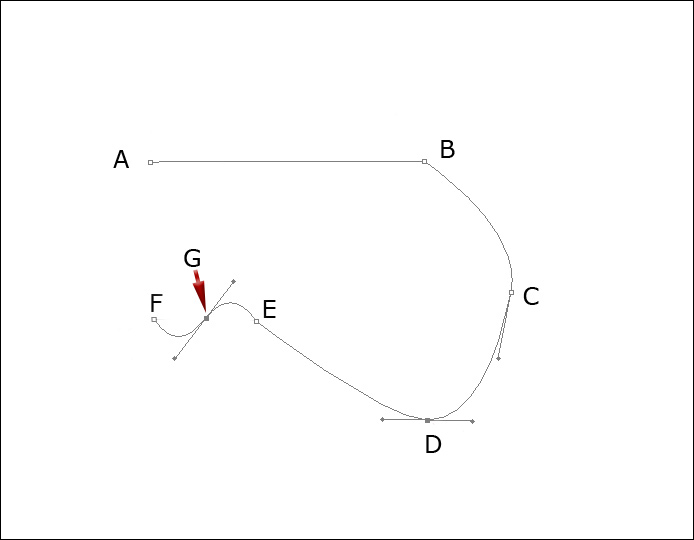
Carefully click on the centre 'dot' (.Anchor Point') at 'G' and you will be able to drag it around to alter its location. Clicking on a 'handle' and moving it, will allow you to change the curvature of the 'Path' between 'E' and 'F'.
It can get a little tricky here. If you miss the 'dot' and 'click' in empty space, you may find that all your 'Anchor Points' disappear! If this happens, don't panic, either use the 'History Palette' or Ctrl + Alt + Z to multiple undo until the 'Anchor Points' reappear.
Deleting
an 'Anchor Point'
From the drop-down list of 'Pen Tool' options, choose
'Delete Anchor Point Tool'.
Go to any 'Anchor Point' and click on it - and it will disappear!
Before proceeding with this exercise, restore any deleted 'points'.
Converting
an 'Anchor Point'
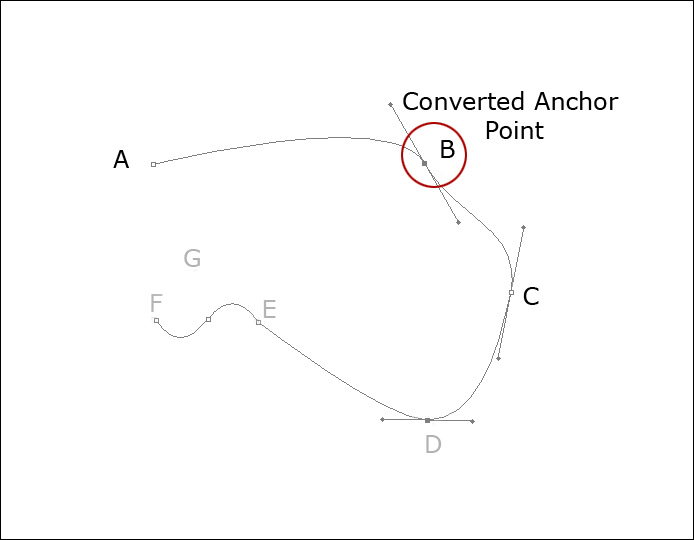
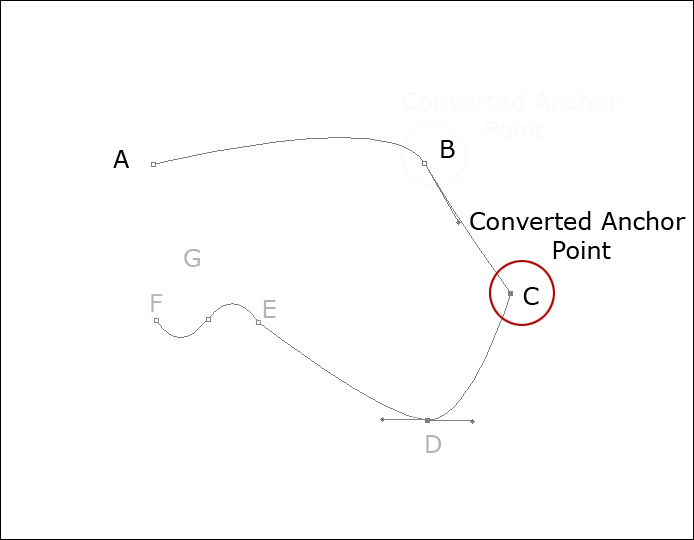
You'll
have noticed that simple 'Anchor Points' connect with straight lines making hard
angles, however an 'Anchor Point' can be converted from a 'simple' 'point' to
one with 'Handles'.
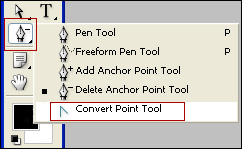
From the drop-down list of 'Pen Tool' options, choose 'Convert Anchor Point Tool'.