Digital Infrared Capture & Workflow continued
Clive R. Haynes FRPS
In the dialogue box, click on 'Auto' (yes, not something most of us would normally do I know, but have faith). The purpose of this is to give a really useful boost in contrast - in fact it produces a result which is difficult and certainly less consistent, than that obtained by adjusting the Levels 'sliders'.
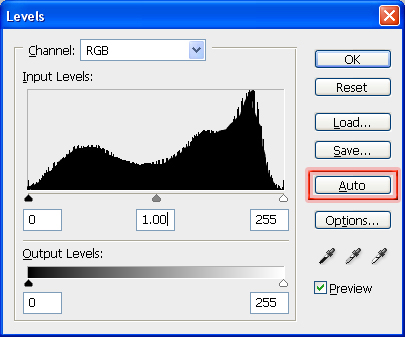
Following 'Auto-Levels', the result is frequently of a pleasing tonal range, however, it is, of course, image-dependent. An example would be a scene which includes a blue sky and some clouds, 'Channel-Swapping' will tend to give a result which offers a blue-shaded sky with the remaining areas represented by tones of peach, apricot, magenta and cool slate blues 'mapped' over the grey-scale content. At this point you can decide to work with the partially toned result or convert to monochrome, apply 'curves', colour tone, whatever.
Although not on an Adjustment Layer, you can experiment with the following additional 'tweaks'. They sometimes may prove of
service Try: Image > Adjustments
> Auto Colour Image and / or Adjust > Auto Contrast
The above are naturally content and contrast dependent but sometimes they
give that little extra - and such factors do inject an element of serendipity
into the process - just like the 'old days' really!
I'm making a note here about converting to monochrome (it's also rerpeated in another section later).
Frequently the best method for making a monochrome (B&W) image is to work on the picture after Channel Swapping.
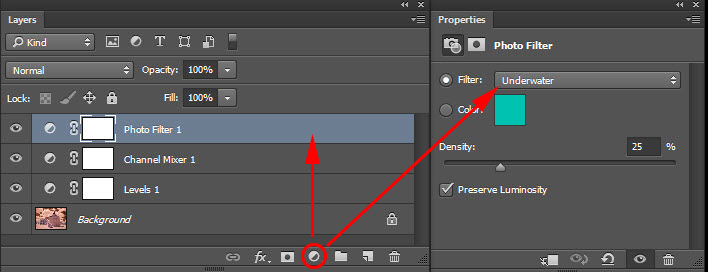
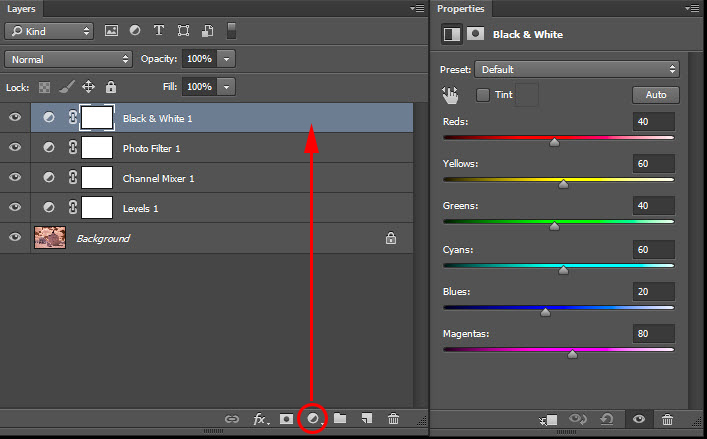
Firstly from the Adjustment Layer menu, choose 'Photo Filter' and select 'Underwater' (at 25%). This will reduce any magenta cast that is sometimes present present.
From the Adjustment Layer drop-down menu add 'Black & White' to the top of the layer stack. The image will immediately be show as monochrome. The advantage is that the 'slider' controls will have tonal inflluence upon the content. The 'sliders' that will offer most effectiveness are: Blue, Cyan, Magenta and Red. See below
Make an 'Action'
It's an advantage
to make an 'Action' for the 'Channel Swap', 'Auto-Levels', Photo Filter and B&W procedure
as this will probably become the most frequent 'quick-process' route for
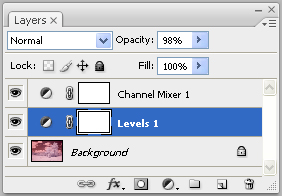
pleasing results for many subjects. Should you wish to view the image
without the 'Channel-Swap' then simply switch-off the 'Channel Mixer Adjustment
Layer'. The image will now equate to the jpeg impression referred to earlier.
'Image Noise'
One of the attributes of IR film was its gritty, granular appearance and
many considered this to be part of its attraction. DI IR will tend to
be less granular; however, those seeking a noise-free result are likely,
at the present stage of technology, to be disappointed. Some noise will
be present.
Cameras fitted with large sensors will exhibit less noise than those with smaller ones at the same pixel-count.
Noise can be reduced by choosing a low ISO setting and reduced still further by a noise reduction filter at the RAW stage. Noise can also be tackled in Photoshop or by using a separate noise-reduction program (such as Neat Image). Conversely, for those wishing to emulate IR film, then increase the ISO and, with care, underexpose slightly so that the image 'Histogram' is 'pushed' a little to compensate during the workflow by adjusting 'Levels' or 'Curves'.
IR Halation Glow
IR film also displayed a sometimes 'interesting' (though at other times,
annoying) 'halation effect', as 'light bounced' off the film pressure-plate.
This can be added to the DI IR image by careful application of blur and/or
glow filters.
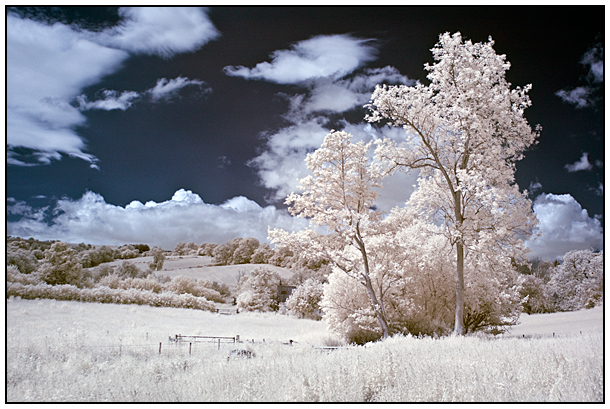
I hope this information about Digital IR has whetted your appetite and that the images that accompany this piece will give an indication of the riches that are out there - awaiting discovery, in the 'invisible spectrum'. And for those who enjoy an element of uncertainty in their photography, the 'serendipity factor' hasn't been entirely eliminated by DI Camera IR - and something of the 'excitement the old days' remains.