Frequently a finished
image may be set off to better effect by surrounding it with a border.
Borders
are easy to make and can be produced in a variety of ways.
Here are some ideas
to try using Adobe Photoshop.
Let's
get started
Firstly, make certain that your image has a Background
layer - if your image doesn't have one, go to Layers > New > Background from Layer
/ Layer from Background (CS) and one will appear.
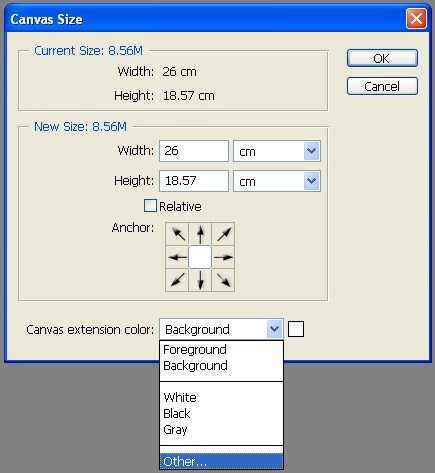
The important thing to remember is that every time you expand the canvas size the space outside the image will be automatically filled by the background colour - or the colour selected in the Canvas Size dialogue box (CS).
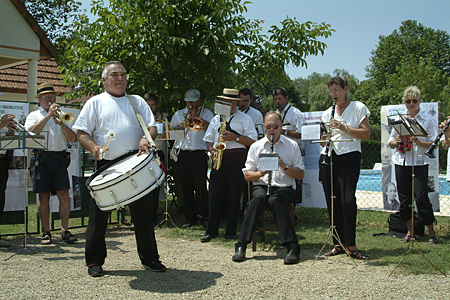
As an example we'll begin by working with a horizontal (landscape format) A4 size image to which we'll add a white pencil-line around the picture, surrounded by a blue border.
Open
your image
Go to:
Image > Image Size.
Make certain that the Resample
Image box is not ticked.
Make certain that 'Constrain
Proprtion' box is ticked
Set the Width to 26cm. (The Height will
take care of itself).
Ensure that the Foreground and Background colours to the base of the toolbox are set to Foreground, blue (or the colour of your choice) and Background, white.

Expand
the canvas area:
Go to:
Image > Canvas Size
Expand Width & Height by 4 pixels.
Use the drop down
arrow ![]() alongside the Width
and Height boxes to enable you to choose the pixel dimensions (rather than inches
or cm's etc)The more pixels you choose, the wider the border will be.
alongside the Width
and Height boxes to enable you to choose the pixel dimensions (rather than inches
or cm's etc)The more pixels you choose, the wider the border will be.
Keep
the image in the centre of the nine small squares in the Canvas Size dialogue
box. This will ensure a regular border width around the outside.
Click OK
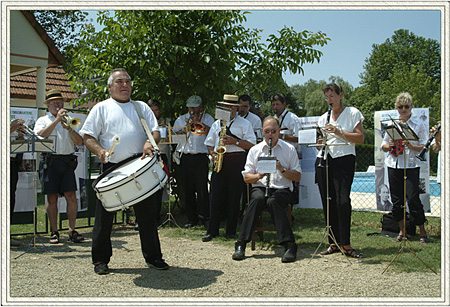
The
image now has a narrow white pencil line surrounding it.
Press Control + 0
(zero) to show the whole image area.
Exchange
the Background and Foreground colours by clicking on the double-ended curving
arrow to the top r.h. of the Foreground/Background colours icon (near base of
toolbox) or simply use the 'X' key on the keyboard - this changes or 'exchanges'
(X-changes) the f/g & b/g colours and is a useful shortcut.
Return to
Canvas Size, this time using the 'cm' dimensions; increase the Width and the Height
by 2cms each. This is, in effect, 1cm for each side of the image.
Click OK
and again view by Control + 0 (zero) and there you have it! - A bright new (blue)
border surrounding your picture. See below.
Photoshop CS users please note that the CS Canvas Size dialogue box in enables more choices - you can choose whether to use Foreground, Background colours or a colour set by choice (Canvas Extension Colour > Other).