How to
make 'Corner Tabs' for a Picture
Continued
Clive R. Haynes FRPS
Masking and editing the 'Tabs'
To make the 'tabs' appear realistic, some tidying and masking will be needed. This is where the Layer Masks will prove of great benefit. However, it will be a lot easier to 'edit' the 'tabs' as one layer rather than as either two Layer Groups or as individual Layers within the Group. This is easy to achieve.
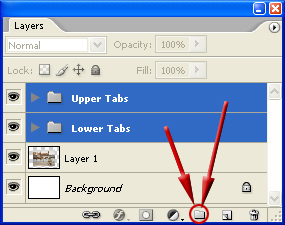
Activate both Layer Groups and drag them simultaneously to the 'Group' icon at the base of the Layers palette. A new Group is created (with the 'Upper' & 'Lower' Groups inside). Name the Group 'Tabs'
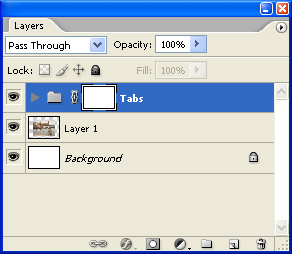
The Layer Mask can now be edited using the 'Brush Tool' in the normal way - Black Foreground colour will 'erase' whilst White Foreground colour will 'restore'
The whole layer structure has been arranged for maximum editing flexibility
'Tabs' as a Template
Should you wish to use the 'Tabs' for another image there are two ways of doing this: Either copy both upper and lower tab groups to a new 'Group' and 'drag' this Group Layer onto the fresh picture, then Edit > Transform > Scale as necessary, or drag the new image to the layer above 'Background Copy' in the original layer structure and proceed from there - 'Transforming' the new image as needed.
Option 1
Placing
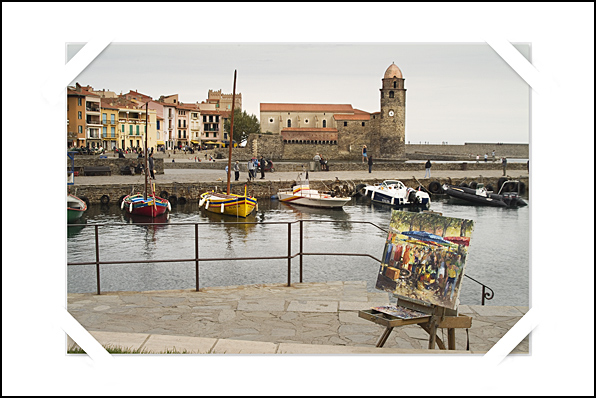
a 'Drop Shadow' on the image layer may improve three-dimensionality.
Activate
the Picture Layer (Layer 1, above 'Background'), then use normal procedure for
creating the Drop Shadow
Option 2
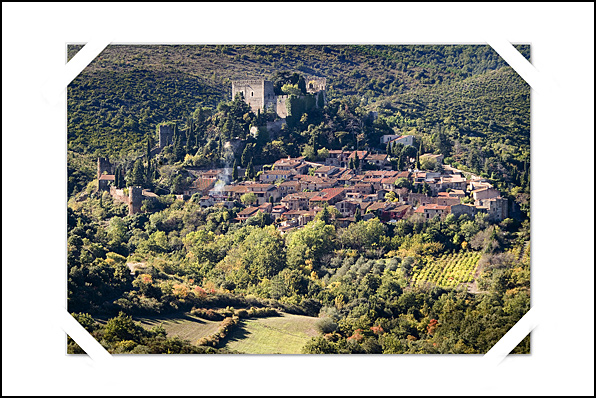
Create an 'inset effect' just outside the main picture area to give the illusion of depth to the 'virtual mount'
In
the worked example above the file size is around 8mb. I made a 'Rectangular Selection'
about 10 pixels outside the main picture area.
A New (empty) Layer was created
above Layer 1 (Picture).
The 'selection' was 'stroked' with black at 5 pixels.
The Opacity for the 'Inset Layer' was reduced to 8%